Illustration of artefacts has been evident through publications from the Antiquarian era through to the present. They show us the typology of the piece, giving context (Piggott 1965, p166). 
Malton Museum Chalk Figures Photo credit author (27/09/2018)
The Illustration process
On arrival the chalk figures had been removed from the display and were ready for me in the work room. I must admit to feeling really giddy at the thought of handling these Iron Age pieces, my heart was pounding as I picked up the largest of the two. I was quite surprised that I wasn’t asked to wear white gloves. I set out the drawing board with the graph and tracing paper which had masking tape on the opposing corners to smooth out any bubbles. Using the graph paper made it easier to place the artefact and in using the guide lines (Adkins and Adkins, 1989). In ideal situations you would use a digital camera, a lighting system with stand but I did not have these so instead I only had the room and my camera light to illuminate the artefact.
The equipment I used was:-
- Tracing paper and drawing board with graph paper underneath
- Set squares to measure the length etc and as a size gauge
- Profile gauge – pressed gently to get the figure profile
- Digital callipers, measuring every few cm to get the items thickness
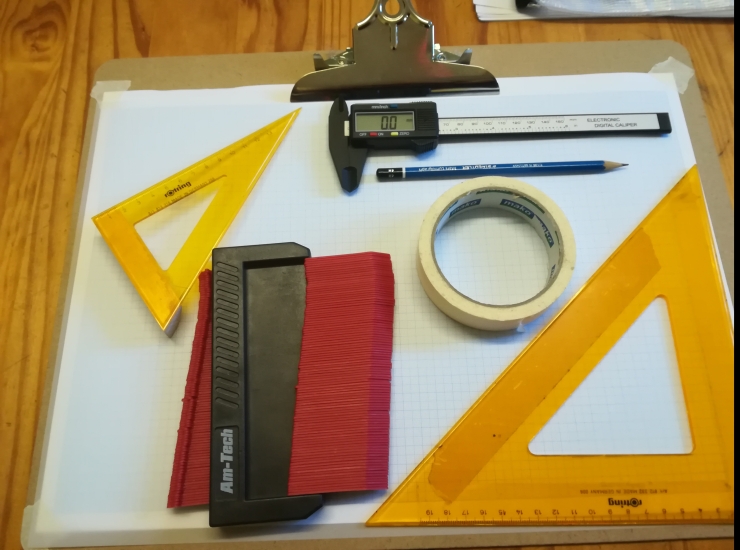
Illustration equipment Photo credit author (27/09/2018)
I started by measuring the most intact chalk figure and plotting it onto my tracing paper intending to draw it 1:1.
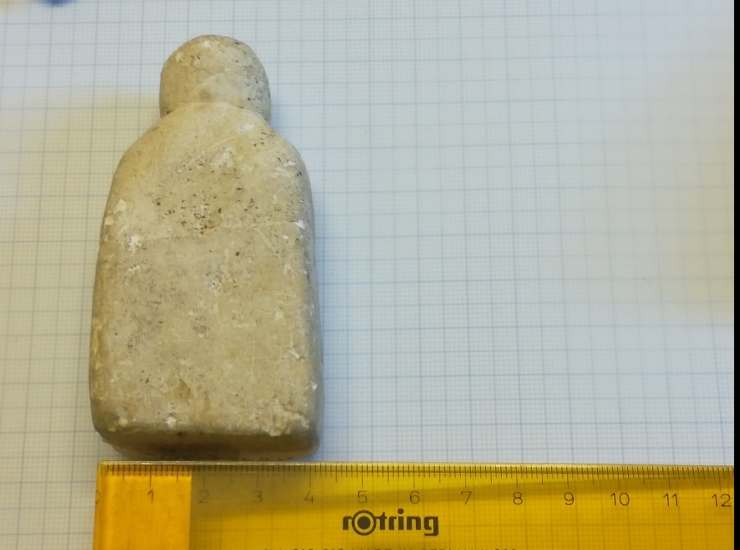
Measuring the chalk figure Photo credit author (27/09/2018)
I then used the profile gauge to plot out the curve of the figurine onto the paper

Using the profile gauge Photo credit author (27/09/2018)
I then used the callipers to measure the thickness and to check that the drawing would be accurate to the profile gauge

Using the digital callipers Photo credit author (27/09/2018)
I then drew the figurine onto my tracing paper and put the measurements onto the paper at various points.


Illustration Photo credit author (27/09/2018)
Using the figurine, I drew the indents that were visible onto the tracing paper, measuring with the set square to make sure they were placed accurately.
Illustration isn’t my strong point and I don’t think I did the figurines justice at all. I am an abstract artist so having to draw form I found very difficult. I was also under time constraints at the museum as I only had an hour to do the photos and the illustration, so if I were to do it again I would definitely make sure I had longer to do it in. I will use the images in my dissertation and further research into the chalk figures in the future. Creating illustrations like these are often used in archaeological publications, and also if they were to be used in a public lecture explaining about their features.
References
Adkins, L. and Adkins, R. (1989). Archaeological illustration, Cambridge; New York: Cambridge University Press.
Piggott, S. (1965). Archaeological Draughtsmanship: Principles and Practice Part I: Principles and Retrospect. Antiquity, 39.
